

G-code is a particular kind of computer code that guides machines on how to carry out specific tasks. It is mostly used in production and can regulate anything from a machine’s speed to the heater’s temperature. There are a few things you should be aware of before you begin using G-code in your work. In this article, we’ll examine G-code files, what they are, and how to make G-code for a 3D printer.
Table of Contents
What are G-code Files?
A G-code, often known as a “G” code, is a basic computer language used to control a printer. The extruder and bed temperatures, the length of any interruptions in the process of printing, the speed at which the printer’s head travels, etc., are all factors that affect printing quality.
G-codes can be used with a wide range of machinery; they are not just for 3D printers. Lathes and mills, as well as other cutting-edge machinery, use G-codes. On a computer, the G-code file can be edited and viewed.
If you have an STL file that has been converted, you can slice it into layers and convert it to G-code. Only G-code files can be processed by printers.
How does G-code work?
The programming language G-code, which stands for “Geometric Code,” is used to operate CNC machinery, including milling machines, lathes, and 3D printers. It gives the machine instructions on how to move, position, and carry out different operations on a workpiece. CAM (Computer-Aided Manufacturing) software frequently generates G-code commands, although programmers can also manually write them.
Here’s how G-code works:
1. Command Structure: G-code is made up of separate instructions, each of which is denoted by a letter (often uppercase) and a numeric value. G, M, X, Y, Z, and F are the most frequently used commands. The number or value provides the precise action or parameter, whereas the letter designates the type of command.
2. Coordinates: Coordinates that specify the location of the tool or workpiece are frequently provided in G-code commands. The linear movement along each axis is represented by the letters X, Y, and Z. In this case, the command “X10 Y20” would move the tool to the machine’s work area at coordinates (10, 20).
3. Feed Rate: The speed at which the tool moves during machining processes is controlled by the feed rate (F) command. Units per minute, such as inches per minute or millimeters per minute, are typically used to specify it.
4. Tool Movements: The machine is moved in a variety of ways using G-code commands, including quick movements (G0), linear interpolation (G1), circular interpolation (G2/G3), etc. G1 directs the machine to travel in a straight line, G0 denotes a quick motion to a specific location, and G2/G3 is utilized for circular or arc movements.
5. Modal Commands: Certain G-code instructions are modal, which means they continue to operate up until another instruction of the same kind is met. For instance, once a feed rate (F) value has been specified, it applies to all upcoming movement commands.
6. Machine States: G-code commands can also manage the settings of a machine, like turning the spindle on or off (M3/M5), controlling the flow of coolant (M8/M9), and more. Usually, these commands start with the letter “M.”
7. Comments: G-code can handle comments, which are program lines that start with a semicolon (;). The machine ignores these comments; rather, they are utilized to offer notes and explanations to human readers.
8. Execution of the Program: Line by line, the CNC machine reads the G-code program and performs the associated instructions. According to the set coordinates, feed rates, and commands, it moves the tool or workpiece.
9. safety concerns: G-code must be written precisely since errors can result in workpiece damage or machine crashes. Before beginning actual machining, tool paths are frequently checked using previews and simulations.
G-code acts as a link between the CAD (Computer-Aided Design) software-created design and the actual machining operation carried out by CNC machines. It enables accurate control over the machine’s movements, making it possible to produce complex and precise pieces.
How to Create a G-code File for a 3D Printer?

G-code is a defined language that 3D printers use to understand and carry out the instructions required to construct a 3D item layer by layer. Typically, the steps below must be followed to generate G-code files:
1. Design Your Model: Create the 3D-printed object using 3D modeling software. SelfCAD, Tinkercad, Blender, Fusion 360, SolidWorks, and others are popular choices. In the software, build or upload your design.
2. Export your design as STL: Once it is finished, export it in an STL (Stereolithography) file. Information about your model’s geometry is contained in STL files.
3. Slicing Software: Use slicing software to transform your 3D model into G-code. Your 3D model is put into slicing software, which decides how to slice it into layers and how to move the printer’s nozzle or extruder to produce each layer. SelfCAD, Cura, Simplify3D, PrusaSlicer, and Ultimaker Cura are a few popular choices for slicing software.
- Set up the computer’s slicing program.
- Import the STL file into the software used for slicing.
- Create printing settings for layer height, infill density, print speed, and other factors. Your print’s speed and quality will be affected by these options.
- If your 3D printer isn’t automatically recognized, choose the model or provide its specifications.
4. Slice and Create G-code: After setting up the parameters, you must “slice” the 3D model. The G-code commands are generated by this process using your preferences. The 3D printer’s instructions are contained in a G-code file, which is created by the slicing program.
5. Save G-code File: Save the resulting G-code file to your computer or a USB drive or SD card that will be used with a 3D printer. Be sure to keep in mind where you stored the file.
6. Print Your Object: Follow the manufacturer’s instructions to load the G-code file onto your 3D printer. A USB drive or SD card must typically be inserted, or your computer must be connected directly to the printer to accomplish this. Then, start printing using your printer’s user interface.
Keep in mind that depending on the 3D printer and slicing program you’re using, the precise processes may differ significantly. Always refer to the user guides and manuals that come with your printer and software. Consider the material you’re using, the printer calibration, and any additional factors that could affect the print quality.
How to Make a G-code File in SelfCAD?
Following is the process of generating G-code in SelfCAD:
Step 1: Login in SelfCAD

Visit the main page and log in to use SelfCAD. To use the full features of the software, you may start with a free account and then upgrade to a paid one. The software is available for Windows and Mac users to download or use online. These two programs are coordinated with one another. You can obtain anything you do offline and online as well.
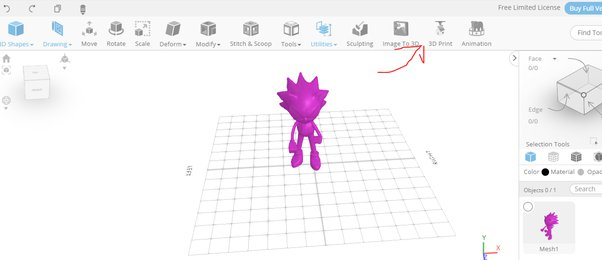
Step 2: Create or Import an STL File

Use the Import feature in the website’s File area to import an STL file into SelfCAD to convert it to G-code. As an alternative, you can get models from sites that sell 3D models, like Cults3d, Myminifactory, and Thingiverse.
Step 3: Select your 3D printer using the slicer, then start slicing the model.
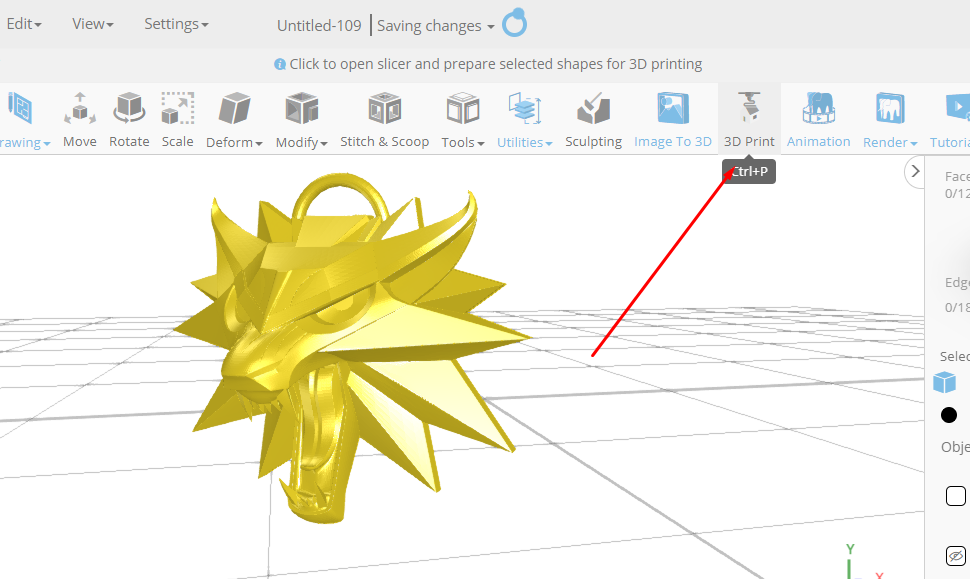
In the slicer, you must first choose your printer. You must select your 3D printer after you have access to the slicer. You’ll be prepared to slice your design and produce the G-code once you’ve decided on the 3D printer. You can also modify your settings according to your needs. If you are unfamiliar with the precise settings, you can leave them as they are.
Step 4: Start Slicing and Save the G-Code

After selecting your 3D printer and selecting the precise specifications for your design, pick Slice to begin the procedure. You should be able to see how long it will take to slice your design, how much material will be used, and a sample of how your design will look after being 3D printed.
After finishing, you can save your G-code to your PC. Get to know how SelfCAD slicer works in the video below.
Mastering G-Code Generation for Precise 3D Printing
Creating G-code files for 3D printing may be a complicated process, depending on the software you selected. Ensure that your G-Code file includes all the necessary commands for a successful 3D print. Double-check your settings, such as layer height and print speed, to optimize print quality. Once you are confident in your G-Code file, transfer it to your 3D printer and start printing. Remember, accuracy and attention to detail are key to creating a successful 3D print. Good luck!